Rimage Amigo II User Manual

Browse online or download User Manual for Print & Scan Rimage Amigo II. Replace the Producer II

  • Download
  • Add to my manuals
  • Print
  • Page
    / 2
  • Table of contents
  • BOOKMARKS
  • Rated. / 5. Based on customer reviews
Page view 0
OR
Serial Cable
FireWire Cable
USB Cable
Printer Cable
Printer Power Cord
Printer Power Cord
USB Cable
Printer Cable
Serial Cable
(Amigo II only)
FireWire Cable (Amigo II only)
Power CordPower Cord
USB Cable
Replace the Producer II
Before you begin:
1. Stop or pause all jobs.
2. Power off the external control center (PC).
3. Power off the Producer II.
4. Disconnect the power cord from the Producer II.
5. Remove the cover (Autostar II and Protégé II only).
Caution: Some cables in your system may be latched. Equipment
damage may occur if cables are not disconnected appropriately.
Caution: Lift the Everest printer with care; it is very heavy.
Disconnect the autoloader cables.
Remove the printer.
Use this procedure to set up your replacement unit when you are completing a rapid
exchange.
The term ‘Producer II’ is used throughout this document to refer to the Autostar II, Protégé
II, Amigo II, and AutoPrinter II.
Note: Your system may not look exactly like the system pictured.
At the back of the Producer II, disconnect the cables:
USB cable (Autostar II & Protégé II only)•
Power cord•
Serial cable•
FireWire Cable•
a. At the back of the printer, disconnect the cables:
Printer cable•
Printer power cord•
USB cable•
b. Remove the printer from the Producer II and set it aside.
Everest printer
Prism printer
Autostar II and Protégé II Amigo II or AutoPrinter II
2000710_B Copyright © 2008 Rimage Corporation
1
2
Page view 0
1 2

Summary of Contents

Page 1 - Replace the Producer II

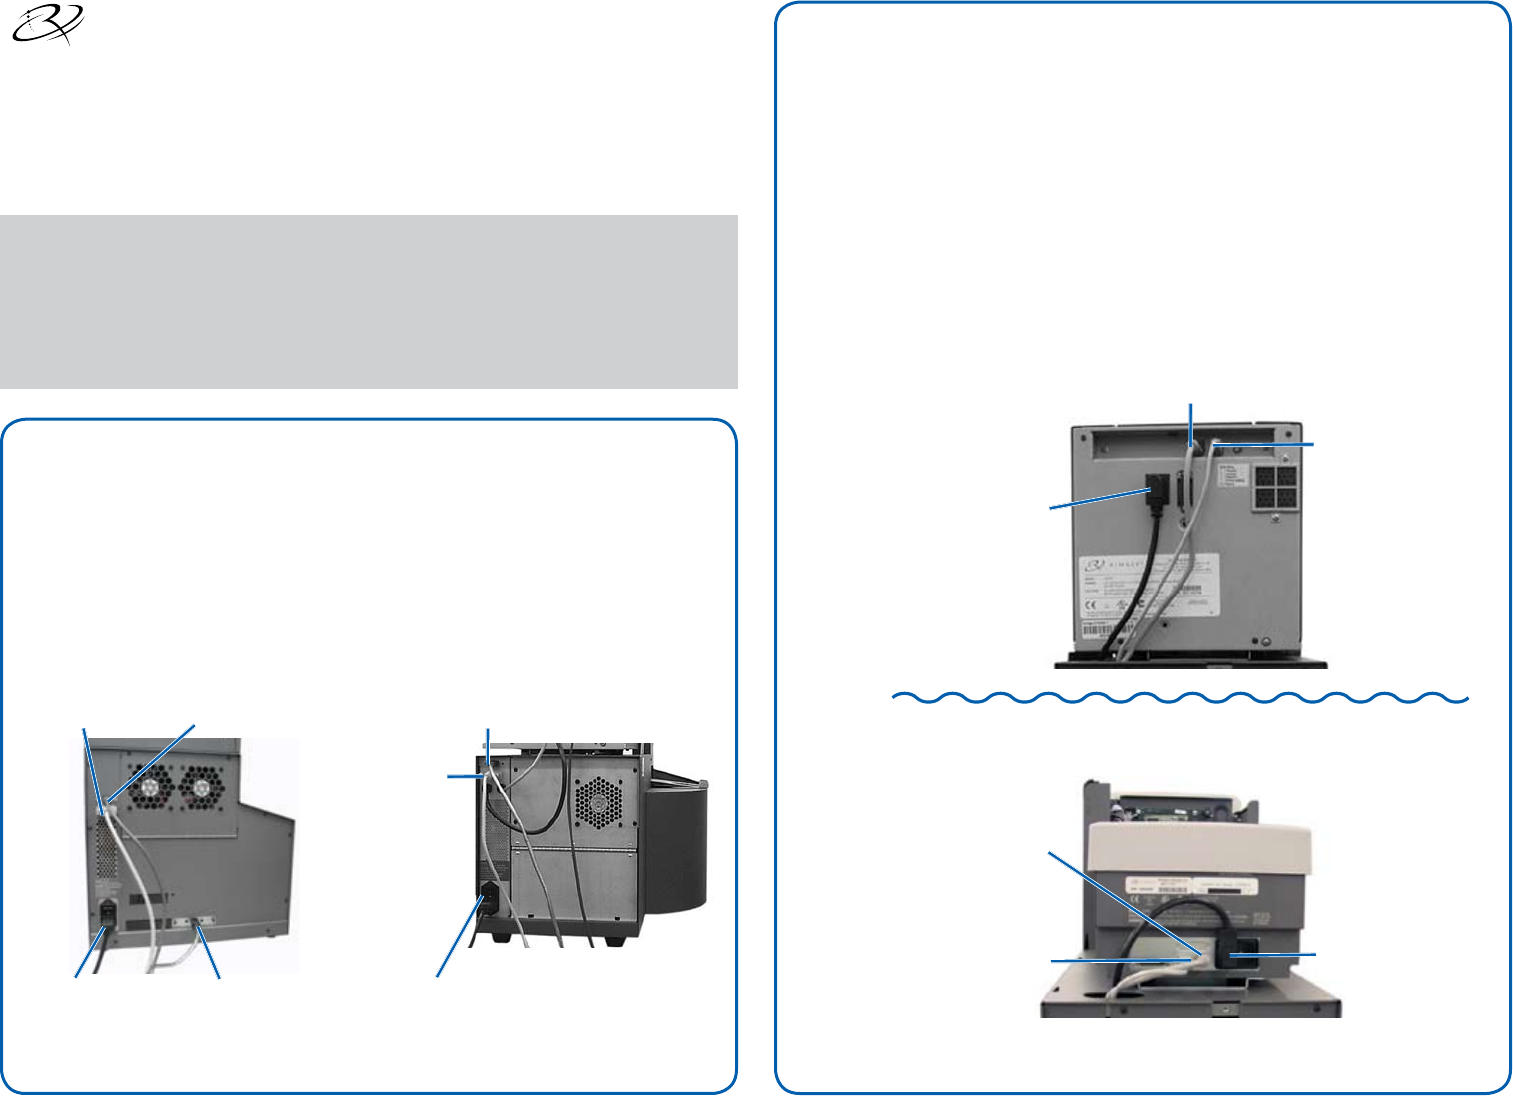
ORSerial CableFireWire CableUSB CablePrinter CablePrinter Power CordPrinter Power CordUSB CablePrinter CableSerial Cable (Amigo II only)FireWire Cable

Page 2 - Update the Rimage software

Tie WrapTie WrapTapeFoamComplete the steps in the setup and installation guide included with your product. The documents are also available at www.Ri

Comments to this Manuals

No comments